 Choosing the right solar professional is a crucial step in your journey toward clean, renewable energy for your home. The Florida Solar Energy Industries Association has developed a comprehensive guide to buying a solar energy system for your home. For helpful tips on how to choose a contractor and to better understand the benefits of using solar energy, visit https://www.flaseia.org/consumers/
Steps for Sizing a Photovoltaic (PV) Solar Energy System Prior to Hiring a Solar Contractor
STEP 1: Determine How Much Energy Your Home Consumes in a Year
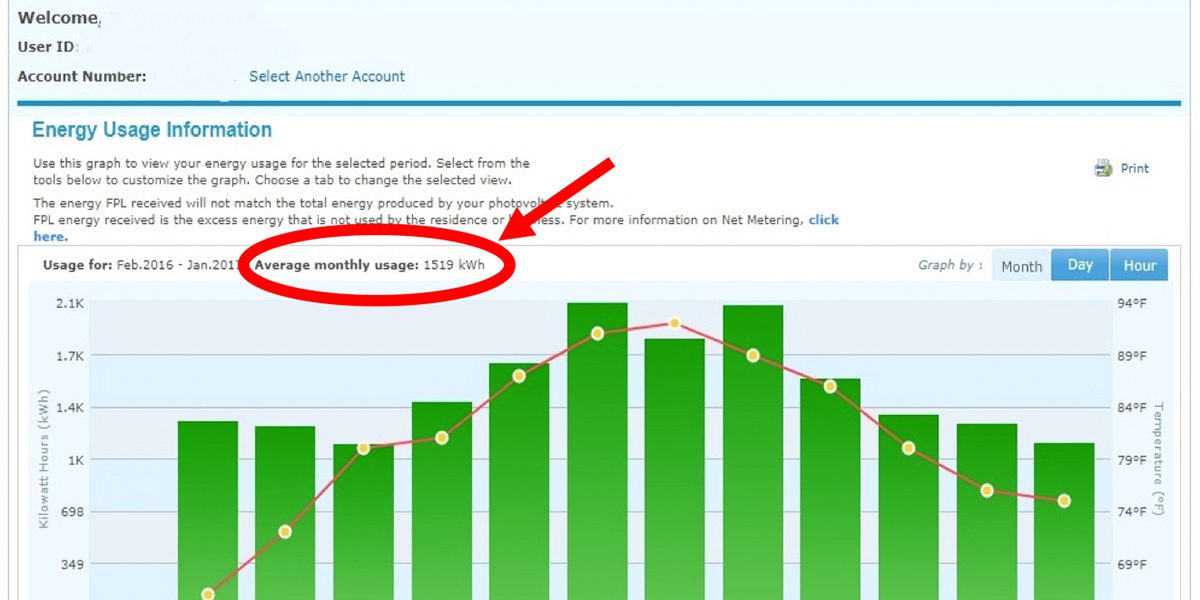
Determine how much energy your home consumes for an entire year. Gather this information from your utility bills for the last 12 months. Most utility companies provide online access to this information. You are looking for the average monthly consumption in kilowatt-hours (kWh).
For example, the billing history below shows that this site used 1519 kilowatt-hours per month, on average, for this 12-month cycle of billing. Now for the year, that equals:
12 (months) x 1519 (per month) = 18,228 kWh energy for the year. You will use this number shortly.
STEP 2: Determine the Best Location to Install a PV System
There are three things to consider when determining a location:
- Azimuth
Azimuth refers to what direction the array is facing (ex: south, southeast, west, etc.) South-facing arrays are best in the northern hemisphere. East-facing or west-facing arrays are fine as well, but do produce a little less energy than a similar south-facing array. Generally speaking, north-facing arrays should be avoided. For this purpose, North will be 0°, East 90°, South 180°, West 270°. For example, southeast would be 135°(half-way between east and south.) - Tilt
Tilt refers to the pitch of the roof for roof-mounted systems. For ground-mounted systems, assume location latitude for tilt (for Cocoa, FL, latitude is 28.5°. Assume the same value of 28.5° for tilt.) Here is a table of tilt corresponding to roof pitch:Roof Pitch (rise/run) Tilt Angle (deg) 4/12 18.4 5/12 22.6 6/12 26.6 7/12 30.3 8/12 33.7 9/12 36.9 10/12 39.8 11/12 42.5 12/12 45.0 - Solar access (or lack of shading)
The primary killer of PV system production is shading. It is far more important to have an unshaded array than to have one that is perfectly oriented to due south. There are some technologies that help mitigate partial array shading, but for this example, the array location should not be shaded between 9am and 3pm on the winter solstice. Consider the future growth of vegetation when conducting your site survey. A good solar contractor will perform a shading analysis to ensure maximum array production before installing the system, but for this exercise, try your best to be realistic about current and future shading conditions. Hint: use Google Earth to look at the bird’s eye view of your house! You can look at potential causes of shading and also determine azimuth this way.
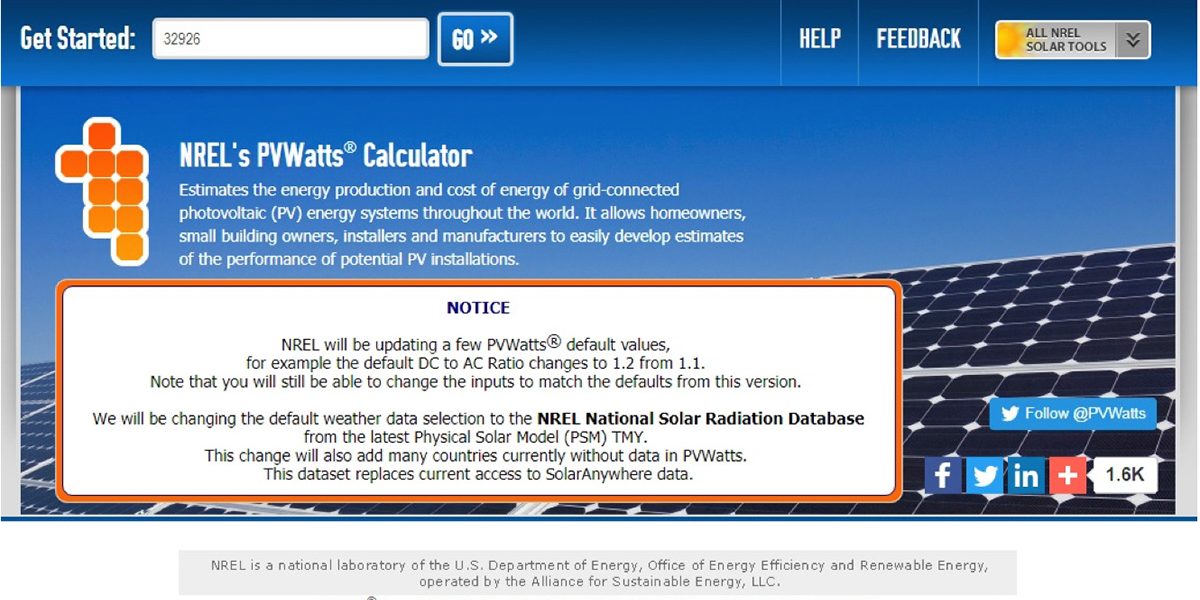
STEP 3: Use NREL’s PVWatts® Online Calculator
The National Renewable Energy Laboratory’s (NREL) PVWatts® Calculator estimates the energy production and cost of energy of grid-connected photovoltaic (PV) energy systems throughout the world. It allows homeowners, small building owners, installers and manufacturers to easily develop estimates of the performance of potential PV installations. The PVWatts’ output is fairly realistic in regards to actual system output, provided accurate inputs are entered into the software.
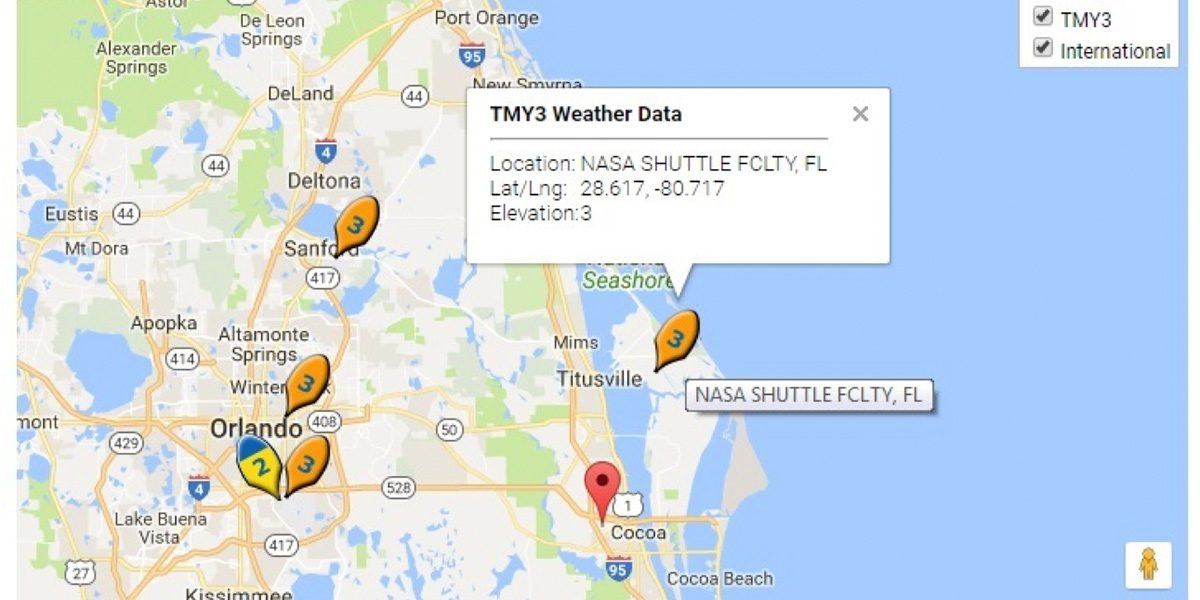
A. Enter the Zip Code for you location.
B. Select the weather station closest to your location
C. Input the relevant site information into PVWatts®
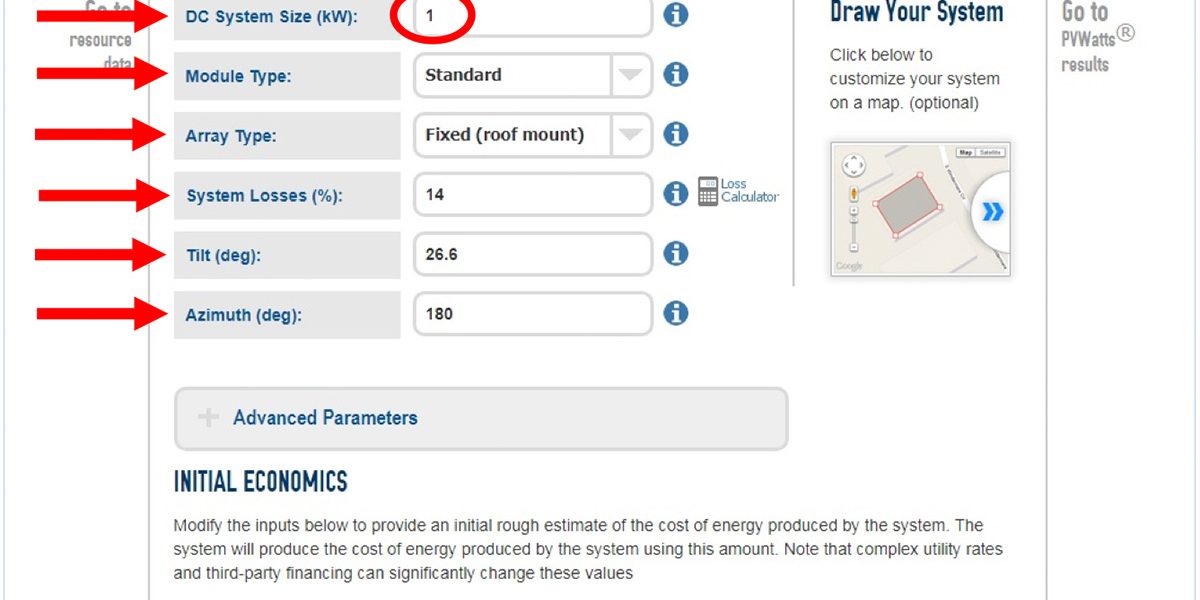
—“DC System Size”: We need to calculate what 1kW of DC input produces for a specific site. Don’t worry about your actual system size yet, we will calculate that later.
—“Module Type”: Leave it as “Standard”. If you end up buying a more premium module type, it will improve the energy numbers a little, but “Standard” is good for the calculations here.
—“Array Type”: Choose “Fixed (roof mount)” unless it is a ground mounted system. If it is a ground mounted system, choose “Fixed (open rack)”
—“System Losses (%)”: Leave the value at 14.
—For “Tilt (deg)”: Input the roof slope where the array will be mounted, or latitude for your location if it is a ground mount system.
—“Azimuth (deg)”: Input which direction the array will face. Again: North 0°, East 90°, South 180°, West 270° and arrays facing in between cardinal directions should be calculated as closely as possible (southeast 135°, southwest 225°.)
—“System Type”: Choose “Residential”
—“Average Cost of Electricity Purchased from Utility”: A common value in Florida is about $0.12. That is 12 cents per kilowatt-hour. This is not critical for system sizing.
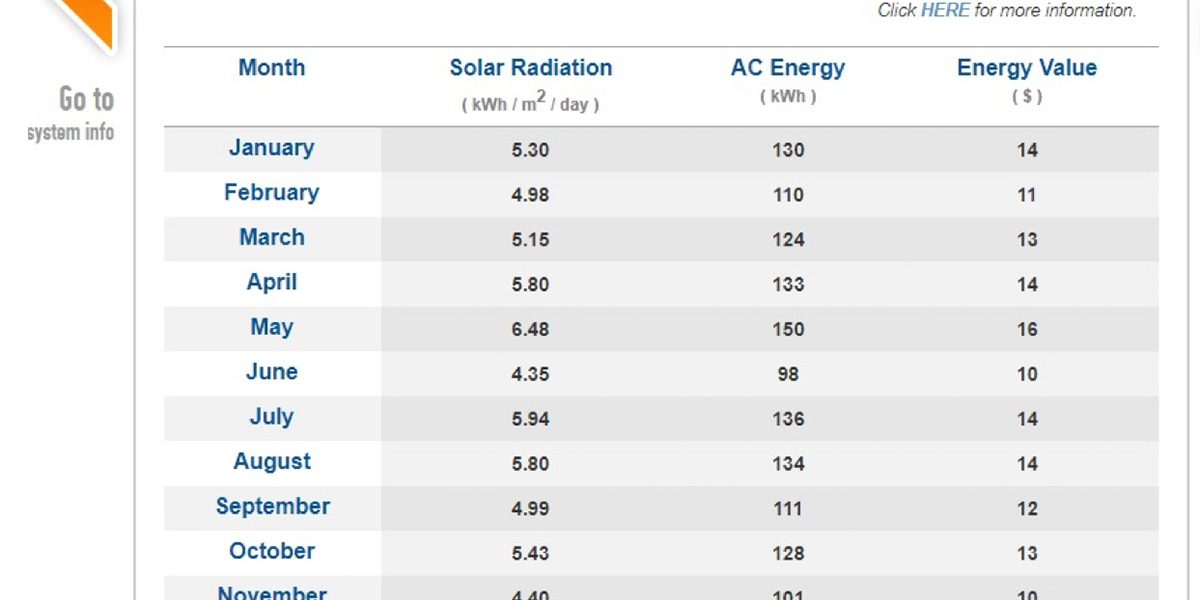
D. Examine Results
STEP 4: Calculate Desired PV System Size
Based on utility billing (STEP 1) and the PVWATTS output (STEP 2), in the example above, the consumed energy for the year was 18,228 kWh AC.
In order to offset this much energy use, you need to know what size your PV array (DC input) needs to be to produce this much AC energy output. Simply divide the yearly consumption in AC energy (Step 1 above) by how much AC energy is produced by 1kW DC (your answer from PVWatts Step 2-D above) and you know what size array you will need.
So for this example, 18,228 ÷ 1,432 = 12.7 kW DC input.
This means that to offset the entire energy bill for this residence, you would need to install a 12.7kW DC rated system.
Reducing the Need for a Large Photovoltaic System
The residence used in the example above was not a good example of being energy efficient. Many homes in Florida do not actually consume 18,228 kWh AC per year. Then again, plenty of them do. This particular residence had an old air conditioner that was quite inefficient and also needed improved insulation in the attic and a new roof. The homeowner replaced the air conditioner with a high efficiency model and replaced the shingle roofing with a reflective metal roof. These steps significantly cut down the energy consumed by the home.
What if you already have an energy-efficient house and still use a lot of energy? The simple answer is that installing a PV system may not entirely eliminate your electricity bill. But what if it cut it by 75%?
Let’s look at the numbers again from the above example. In order to offset 100% of the energy consumption, it was calculated that a 12.7 kW DC system would need to be installed. Let’s assume you want to cut your bill by 75%. Multiply that 12.7kW DC by 75% (or 0.75).
12.7 kW DC x 0.75 = 9.53 kW DC
A 9.53 kW DC system would be needed to offset 75% of the utility bill.
[Last updated: 3/5/2025]